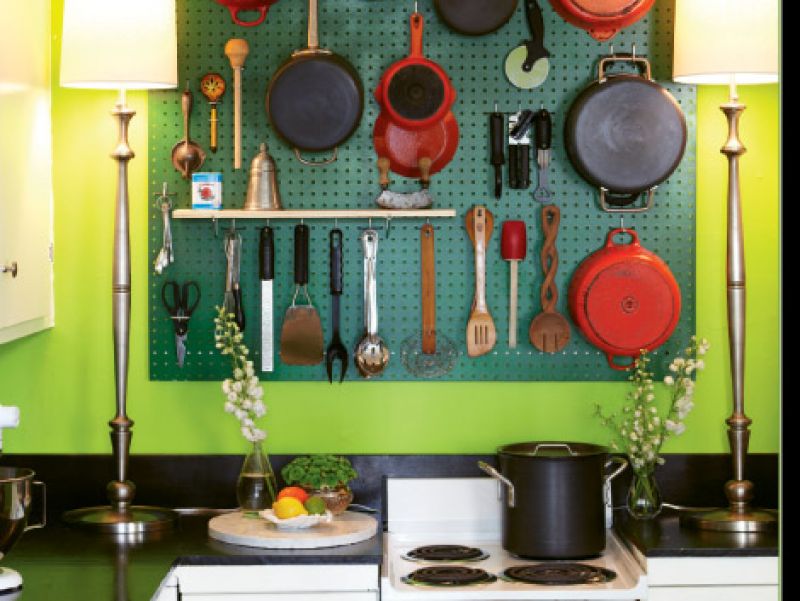
The idea for this pegboard came from Queen Street resident Matthew McLaughlin, whose carriage house is rife with smart ideas. Give yourself about an hour (excluding paint drying time) and you’ll have a system just as smart as his. Cut down on kitchen clutter by installing a standard-issue pegboard. Painted in a favorite hue, it’s a clever way to let stylish cookware take center stage—without taking over your kitchen.
Pegboard Project
1. Using Rust-Oleum Farm Equipment Spray Paint, paint one tempered and perforated hardboard (pegboard), one 1 x 3 x 8-foot white wood board (cut in two 4-foot pieces), and washers for six 1-inch screws. Allow to dry and paint second coat.
2. Hold pegboard in desired location and, using a level, mark the wall with a pencil along the bottom and top of pegboard. Set aside. Measure 4 inches up from the bottom mark and 4 inches below the top mark and note on wall.
3. Using a level and four 2-inch screws, drill white wood boards horizontally to the wall at the new marks. (Be sure at least two screws per board are in wall studs.)
4. Drill the pegboard onto the support boards with the six 1-inch screws and washers. Insert hooks and hang pots and pans.
Resources:
Matthew McLaughlin Design
interiors * events * styling * botanicals
(843) 813-4322
matthewmclaughlin@mac.com